
Another source of winter moisture can be the feeding of syrup in late summer and early autumn which gets stored but not capped. In the spring you can find these frames covered in mold. When creating your winter hive makeup (in our area that is October) make sure you don't have excessive frames of uncapped honey or syrup which will act as himidifiers. As someone who has spent most of their life working outdoors in the winter I prefer 30 below and dry to 2 above (Celsius - 35 Fahrenheit) and wet.
Winter bees are produced at the end of the summer. They are physiologically different from summer bees with a different blood protein profile and fatter bodies with the specific purpose to survive until spring. Once the temperature drops below 14 Celsius these winter bees begin to form a cluster within the hive. The bees on the outside act as insulators with their heads pointed towards the center of the cluster. On the inside of the cluster the bees move their wings rapidly and the friction of this movement creates heat. The centre of the cluster, where the queen resides is approximately 32 degrees Celsius. As the heat rises the bees in the middle of the cluster move outward to become insulators and the outer bees move inward to become heat generators. This movement of bees is continuous throughout the winter.

With the Insulated Moisture Quilt installed the warm air from the cluster rises up through the quilt contacting the less cold, insulated surface. The reduced condensation that is formed will drip on and be absorbed by the wood chips. The air vents will dry the wood chips.
To build the Insulated Moisture Quilt you could simply use a medium or deep super but for those like myself who like to build things here is a step by step description using scrap material. First I screwed together some 6 inch wide 3/4 inch plywood (any 3/4 inch dimensional wood would work) to create a box that would fit on a deep super.
Winter bees are produced at the end of the summer. They are physiologically different from summer bees with a different blood protein profile and fatter bodies with the specific purpose to survive until spring. Once the temperature drops below 14 Celsius these winter bees begin to form a cluster within the hive. The bees on the outside act as insulators with their heads pointed towards the center of the cluster. On the inside of the cluster the bees move their wings rapidly and the friction of this movement creates heat. The centre of the cluster, where the queen resides is approximately 32 degrees Celsius. As the heat rises the bees in the middle of the cluster move outward to become insulators and the outer bees move inward to become heat generators. This movement of bees is continuous throughout the winter.

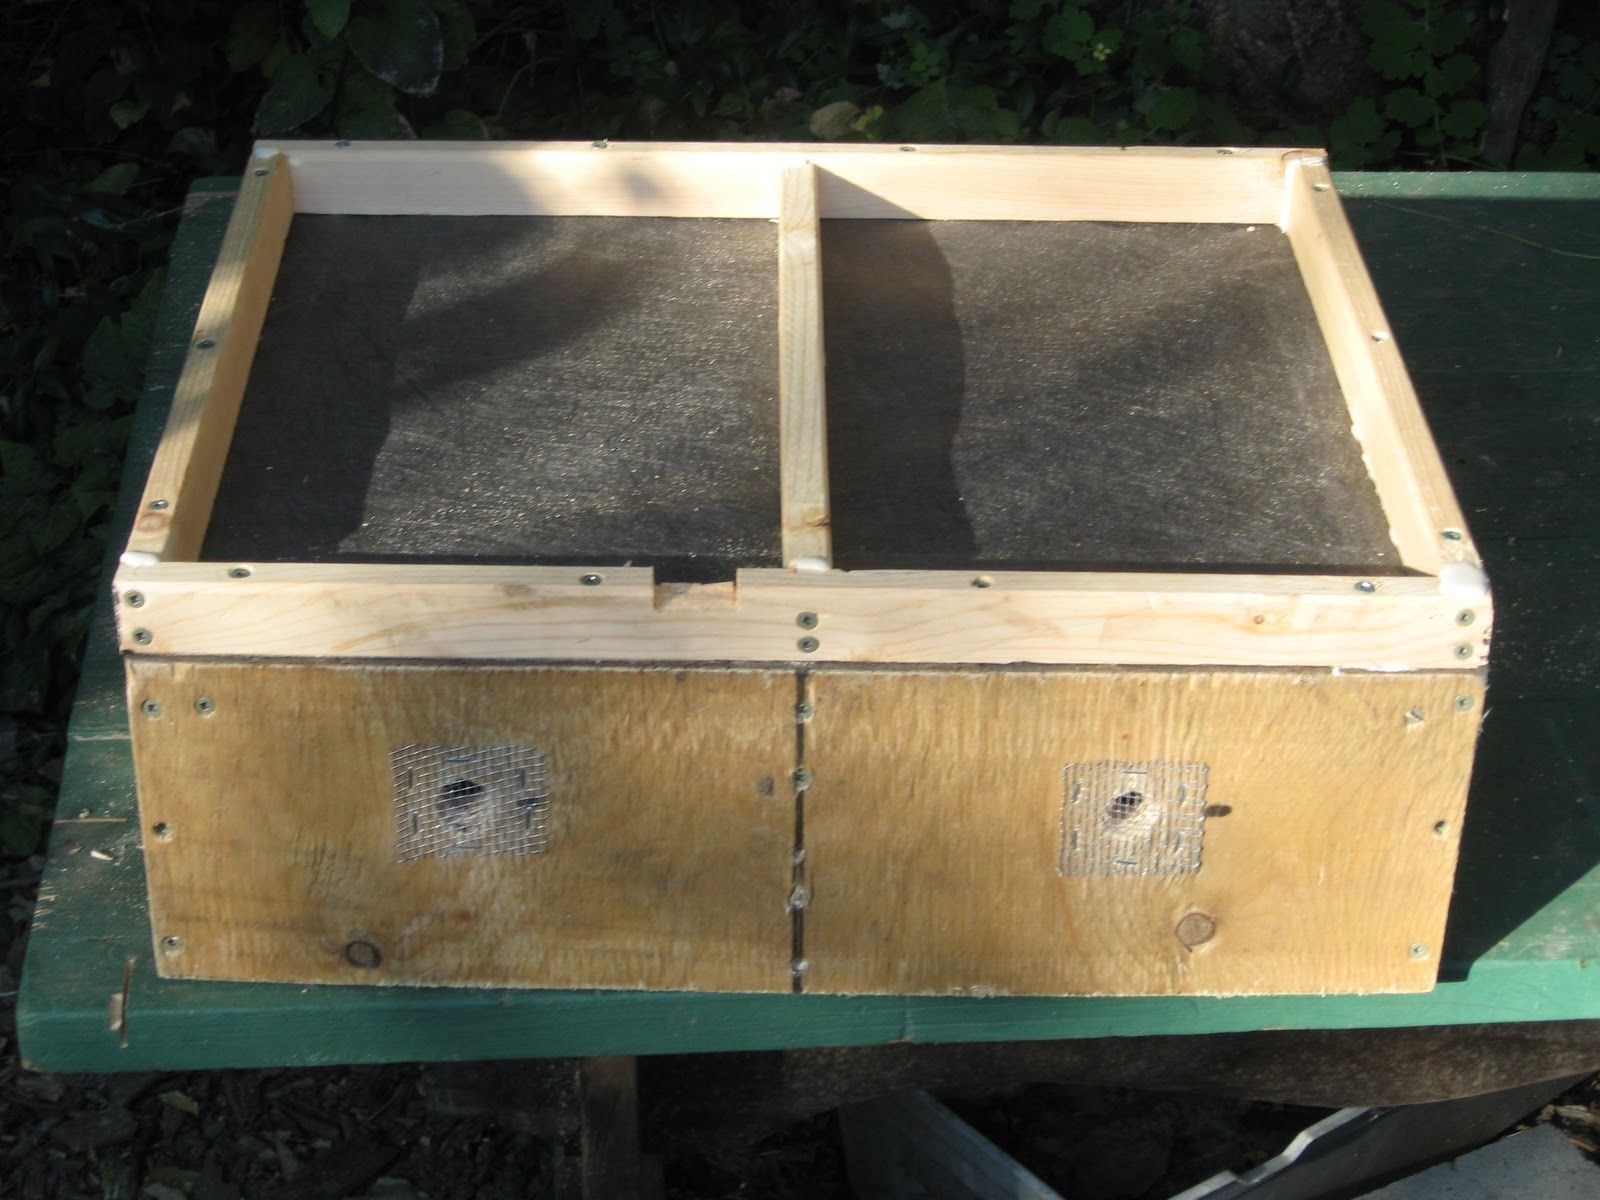
To build the Insulated Moisture Quilt you could simply use a medium or deep super but for those like myself who like to build things here is a step by step description using scrap material. First I screwed together some 6 inch wide 3/4 inch plywood (any 3/4 inch dimensional wood would work) to create a box that would fit on a deep super.
Constructed at Cottonwood Community Garden
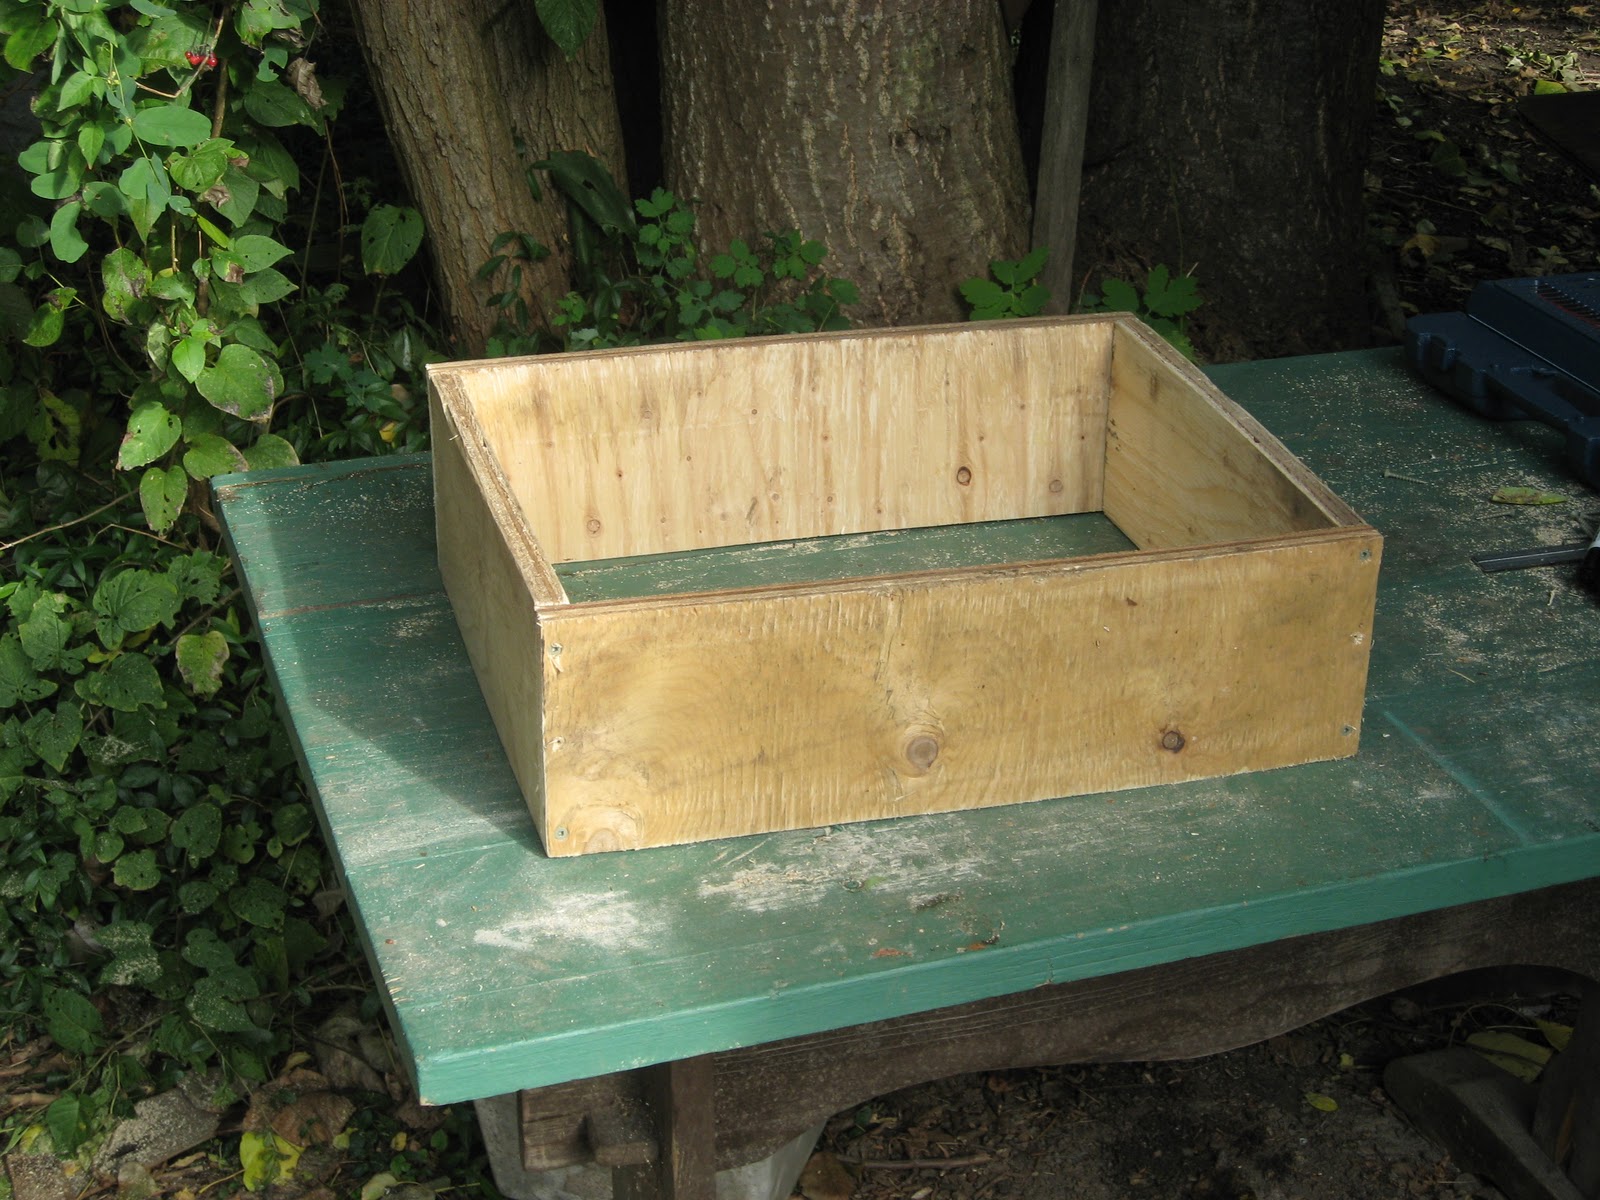
Then I screwed in 3 pieces of plywood 3 inches high.
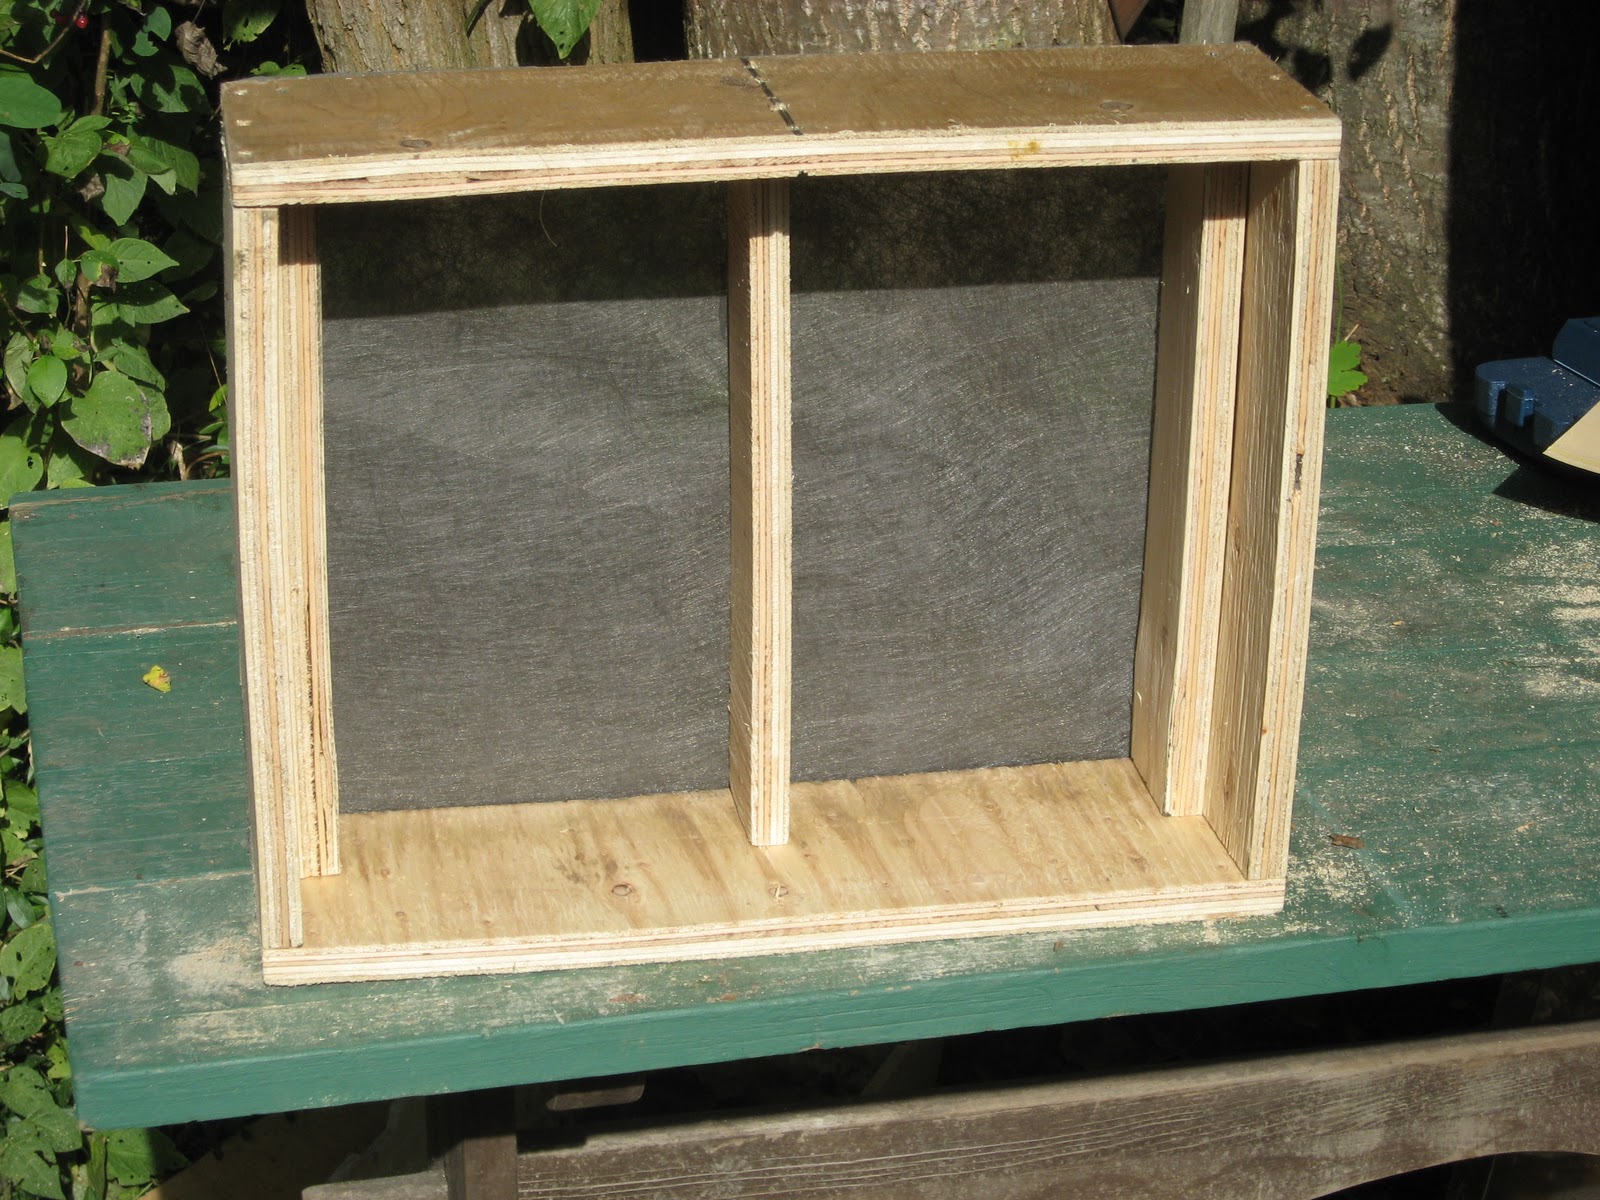
I stapled landscape cloth (porous) over the bottom of the quilt box (2011). More durable and better alternatives to landscape cloth are window screen or 1/8 inch hardware cloth (2017). Also, some have found that the bees will try to work the landscape cloth and get stuck in it. I recommend window screen or 1/8 inch hardware cloth and stapling it to the bottom sides rather than underneath so that a gap (width of the 1/8 inch hardware cloth) is not created between the moisture quilt and the upper super.

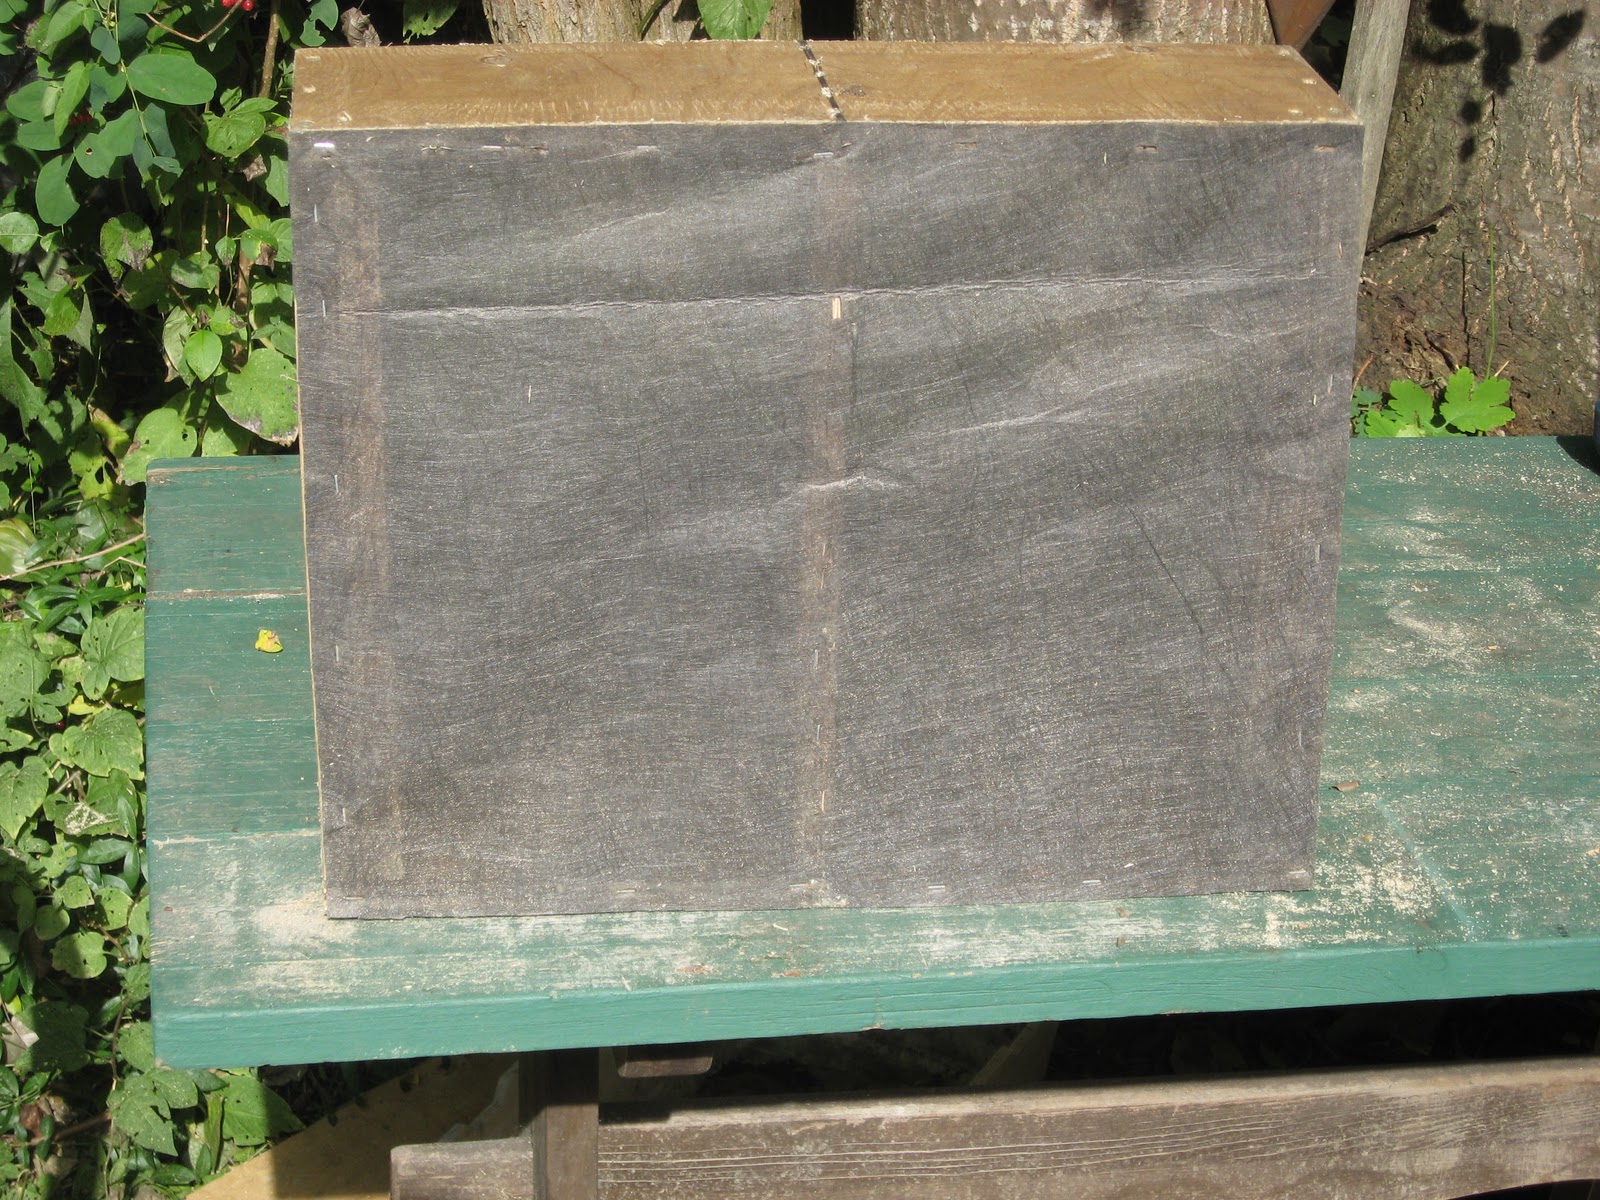
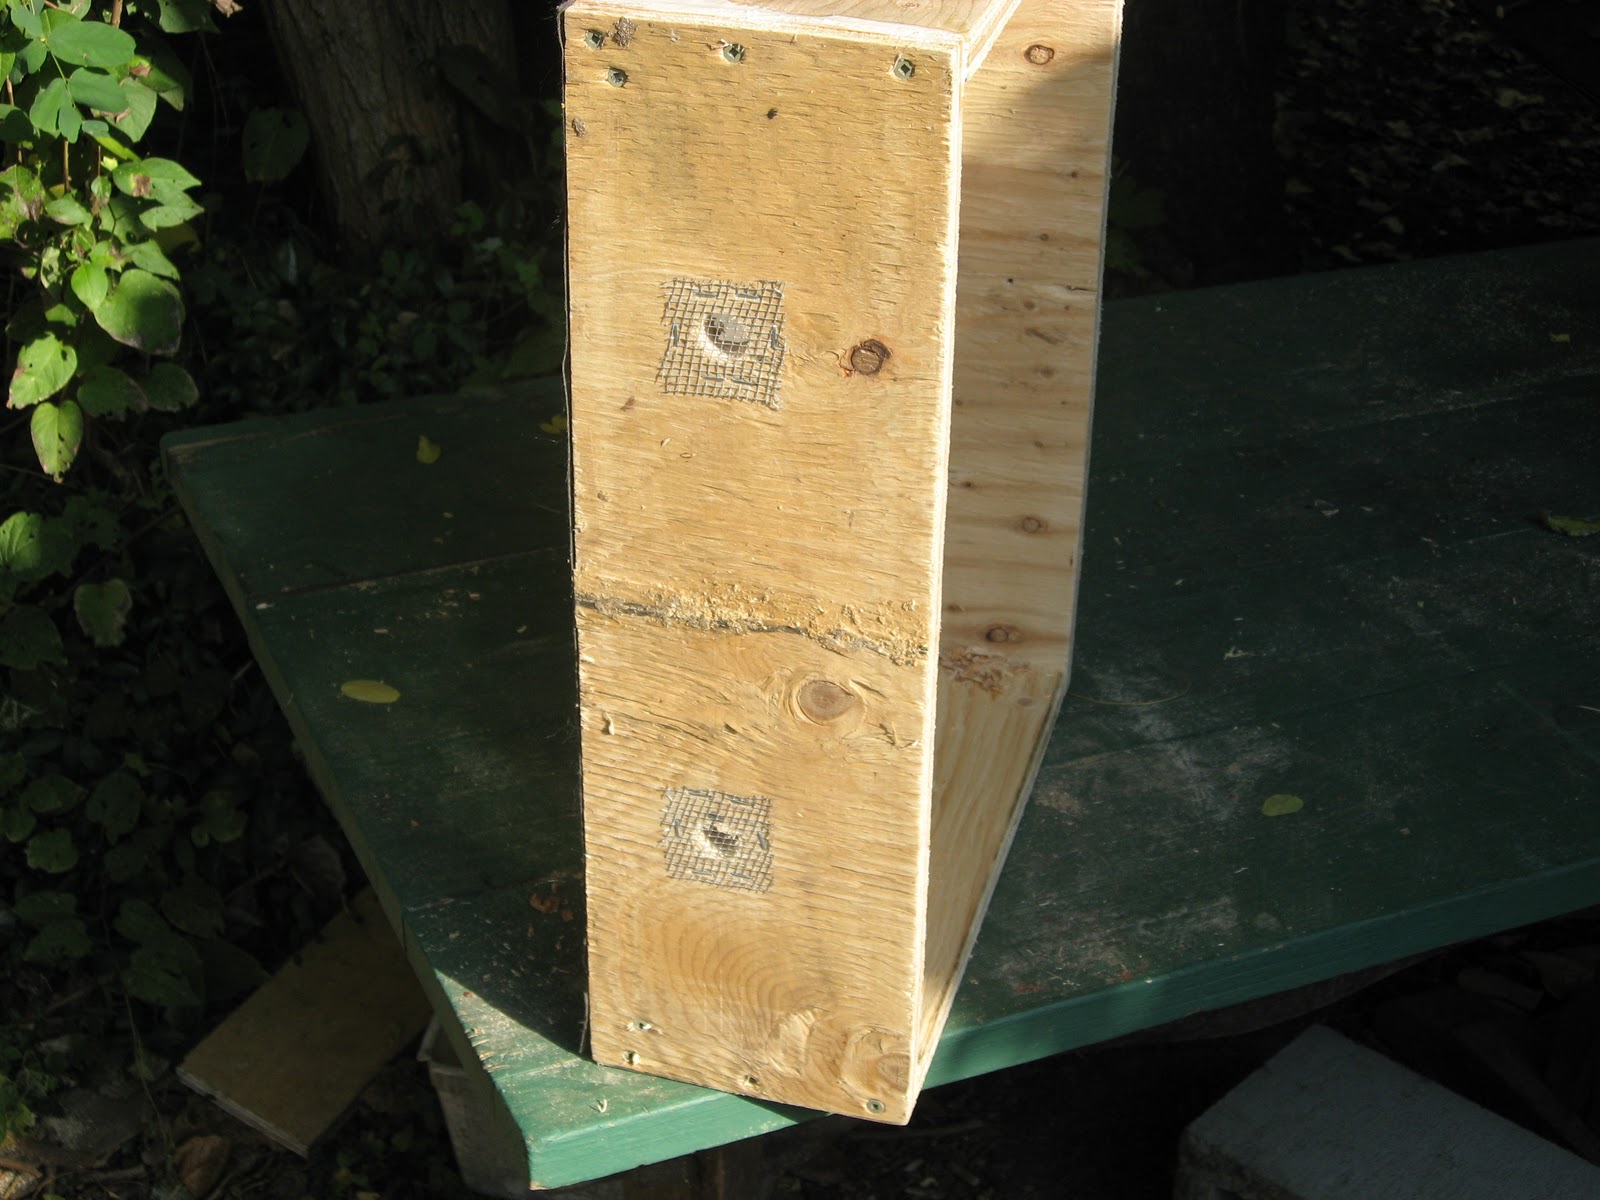
The 3/4 inch vent holes were drilled 2 inches above the landscape cloth. Hardware cloth is applied over the vent holes to prevent entry by bees or mice.

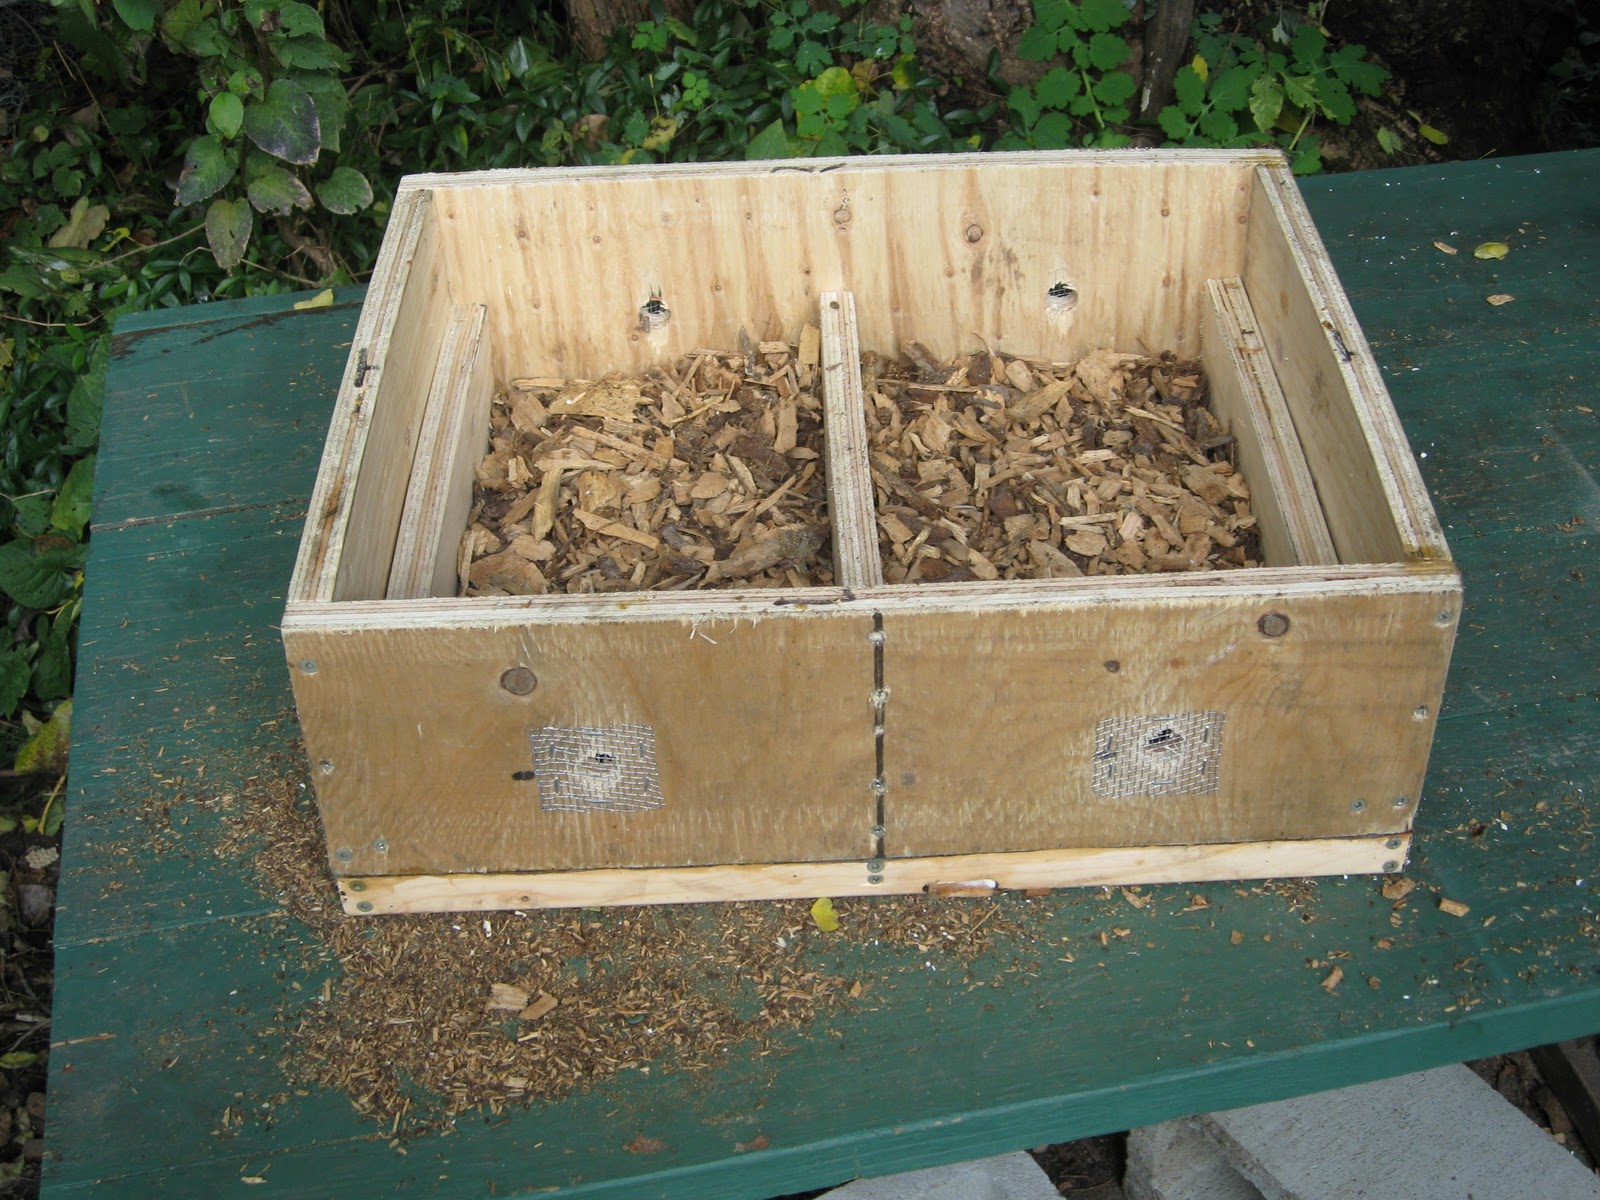
On the bottom I screwed on an optional 1 inch frame so the bees don't attempt to join the frames to the quilt surface. The extra space will allow for pollen patties or sugar feeding in the early spring but could be replaced by a candy board between the quilt and the super to prevent comb building. This space could be modified or reduced to be more in line with proper 3/8 inch bee spacing. I don't find this much of a problem for me as the quilt is primarily on when there is little or no foraging and wax burr comb creation. Note the upper entrance chiseled improperly on the side of the eke. I repaired this and added a front upper entrance.
Two inches of wood chips are added to absorb the moisture.
I added a 1/4 inch plywood cover with stapled rope for easy removal.
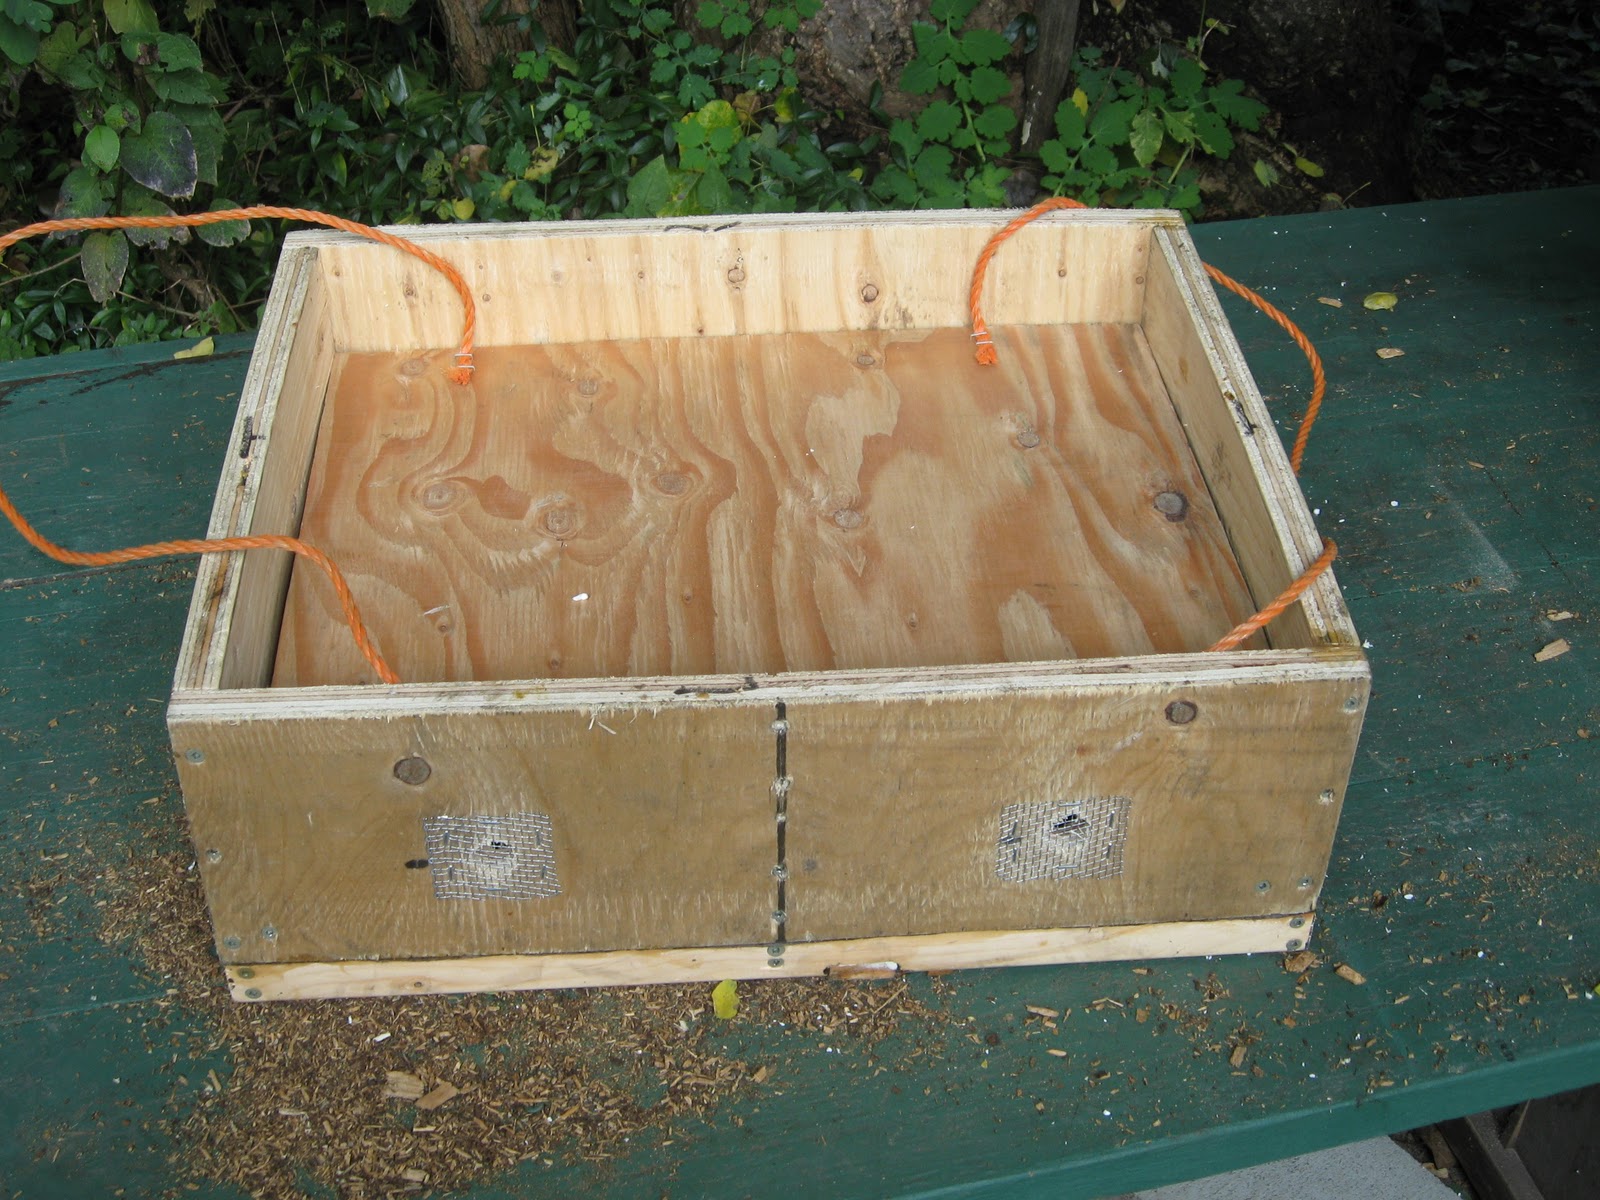
2 inches of solid insulation is added. It's a good idea to paint the finished project for weather protection.

Winter hive set up with 2 inch feeder and insulated moisture quilt

Another way to combat the winter moisture issue is putting a 2x4 under the rear of the hive so that the condensation formed on the underside of the outer cover runs down the front of the hive instead of on the cluster. Also an upper entrance is recommended to increase ventilation. Here are a few different quilt designs and a downloadable version of the Insulated Moisture Quilt: A non insulated Langstroth quilt; A quilt using wool as the absorption material; and a Warre Hive quilt. "The Biology and Management of Colonies in Winter" describes the temperature and moisture dynamics that occur within the hive in cold climates during winter. For more information go to the "Winter Management" section of the Beekeepers' Library.
I received a World Wide Patent on this design which stipulates that anyone who uses this design must give me a jar of honey. What can I say it's the law. All honey related patents in Canada are strictly enforced by the C.H.P. (Canadian Honey Police), Chief of Police Winnie (from Winnipeg) T. Pooh.
 |
| Chief of Police |